

On 23rd March 1942, Adolf Hitler issued Führer Directive No. 40, ordering the creation of the Atlantic Wall. This extensive system of coastal defences and fortifications, stretching along 5,000 kilometres of coastline from northern Norway to the Spanish border, was intended to guard Nazi-occupied Western Europe against an anticipated Allied seaborne invasion.
Due to its proximity to Britain, the coast of Normandy, in northwestern France, was seen as a priority zone, and several strategically sited coastal batteries soon started to appear. One such position was the Merville Gun Battery, located at Merville-Franceville-Plage. Situated near the port town of Ouistreham, the battery covered the estuary of the River Orne, and controlled maritime access to Caen.

The Organisation Todt was tasked with overseeing the construction of the battery, using forced labour. The first casemate to be completed was a Type H611, which required no less than 1,400 m³ of reinforced concrete. This was to be followed by three, smaller Type H669 casemates. All these emplacements were to be covered with earth to blend in with their surroundings. During a site visit on 6th March 1944, Generalfeldmarschall Erwin Rommel ordered the builders to work faster, and by May, the last two casemates had been completed.
The Merville Gun Battery was a formidable position. Apart from the four casemates, other buildings on site included a command bunker, a dormitory, and ammunition magazines. The battery was defended by a 20 mm anti-aircraft gun and multiple machine gun emplacements. The whole site, measuring 640 m by 460 m, was surrounded by barbed wire obstacles and a minefield, whilst an anti-tank ditch covered any approach from the nearby coast. The garrison, commanded by Hauptmann Karl-Heinrich Wolter, consisted of 50 engineers and 80 artillerymen from the 1st Battery, 1716th Artillery Battalion, part of the 716th (Static) Infantry Division.

In the build-up to D-Day, the biggest concern for Allied planners was the H611 casemate, since this type of emplacement was almost always used to house 155 mm field guns with a range of around 17 kilometres. This led to fears that the Merville Gun Battery could threaten the landings at Sword Beach, where the British 3rd Infantry Division was due to come ashore in the early hours of 6th June 1944. It was thus decided that the Merville Gun Battery would have to be silenced at all costs before the landings got underway.
Throughout the Spring of 1944, Allied bombers targeted the battery on several occasions, causing no damage whatsoever, although, during one raid on 19th May, Hauptman Wolter was killed. Oberleutnant Raimund Steiner took command of the battery. Naval bombardment was briefly considered, but doubts about accuracy led to the decision for a ground assault. The mission was incorporated into Operation Tonga, which was to be carried out by the British 6th Airborne Division. Its task was to secure the left flank of the Allied landings. The 5th Parachute Brigade was to capture two vital bridges across the Caen Canal and the River Orne, while the 3rd Parachute Brigade was to destroy the Merville Gun Battery and five bridges across the River Dives.

Within the 3rd Parachute Brigade, the unit given the specific task of neutralising the Merville Gun Battery was the 9th Parachute Battalion. Based at Kiwi Barracks, Bulford Camp, Salisbury, the 9th (Eastern and Home Counties) Parachute Battalion was formed in November 1942, by the conversion of the 10th Battalion, The Essex Regiment - a hostilities-only unit raised in late 1940 - to parachute duties. The battalion was assigned to the 3rd Parachute Brigade, which was initially attached to the 1st Airborne Division, but in April 1943, it was transferred to the then newly-formed 6th Airborne Division.
Like all other British parachute battalions, the 9th Battalion consisted of approximately 650 men. Apart from three rifle companies, named 'A', 'B', and 'C' - each consisting of around 120 men and five officers - there was also a Headquarters Company. This included motorised transport, assault pioneer, machine gun, and mortar platoons. Several other support elements would also be attached for the operation, including sappers and medics. The 9th Parachute Battalion was at this time commanded by Lieutenant Colonel Terence Otway.

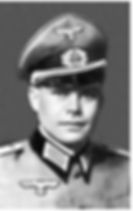
Terence Brandram Hastings Otway was born in Cairo, Egypt, in 1914. He was commissioned into the Royal Ulster Rifles in 1933, serving first with the 2nd Battalion, and later with the 1st Battalion in Hong Kong, Shanghai, and India. In late 1940, now back in England, Otway was promoted to major, and in June 1941, he attended Staff College. Throughout 1942, he was posted to the War Office as a staff officer, but, in July 1943, he returned to the Royal Ulster Rifles as a company commander. In his absence, the 1st Battalion had been converted to an airborne role and was now part of the 6th Airlanding Brigade. The following month, Otway was transferred to the 9th Parachute Battalion as second-in-command, before being promoted to lieutenant colonel and appointed CO in March 1944.
On 2nd April 1944, Otway was informed that his battalion had been tasked with neutralising the Merville Gun Battery on D-Day. He was allowed to formulate his own plan for the assault, but had only two months to prepare his men for it. To make the training as realistic as possible, Otway wanted to build a near-perfect replica of the battery. A spot near Walbury Hill, in Berkshire, which resembled the area where the actual battery was located in Normandy, was found. In just one week, the Royal Engineers built a full-size replica of the battery and its surrounding area, using aerial reconnaissance photos for reference.

Due to the need for secrecy, the entire area was placed under heavy guard with the help of military and civilian police forces. No one without a special pass could make use of nearby roads. The men of the 9th Parachute Battalion then moved in. The first five days were spent briefing the troops and getting them acquainted with the layout of the battery. Then came the practice assaults, using live ammunition. Nine such assaults were carried out in total, four of them in darkness. Every officer and man had to be familiar with every detail so that irrespective of casualties, the survivors could see the whole thing through. The only piece of knowledge that was withheld at this point was the actual name and whereabouts of the battery.
The plan of attack was quite elaborate. The pathfinders of the 22nd Independent Parachute Company, who were to be parachuted at 20 minutes past midnight to mark the drop zones (DZs) for the rest of the 6th Airborne Division, were to be accompanied by a small party from the 9th Parachute Battalion. One part of this group, led by Major Allen Parry, was to mark the rendezvous point for the rest of the battalion and a small landing zone for gliders bringing in heavier equipment. The second part of the group, under Major George Smith, was to head for the Merville Battery to conduct a study of the German defences, using the utmost stealth. In the meantime, the Royal Air Force would carry out a last-minute bombing raid on the battery.


The pathfinders were to be followed by the main body of the 9th Battalion, as well as five Airspeed Horsa gliders carrying specialised equipment, including explosive charges, Bangalore torpedoes, scaling ladders, two six-pounder anti-tank guns, and three jeeps loaded with ammunition. The total assault force was to number around 650 men, including sappers from the 591st (Antrim) Parachute Squadron, Royal Engineers, and medics from No. 3 Section, 224th (Parachute) Field Ambulance. They were expected to arrive at the DZ by 00.50 am. After the gliders had been unloaded, the men were to advance towards the battery.
The main force was to link up with Major Smith of the reconnaissance party, who was to lead them to the firm base he would have previously chosen, and from where the main attack was to be launched. Part of 'A' Company would secure the firm base, while a taping party moved forward silently to cut the wire and mark paths through the minefield. 'B' Company was to lay Bangalore torpedoes to further clear the wire, and these were to be blown just as three other gliders, carrying the rest of 'A' Company, landed inside the battery to attack the casemates with flame-throwers. At the same time, a diversion party was to attack the main gate, while four assault groups from 'C' Company would rush through the gaps in the wire to target a casemate each, all whilst being covered by two sniping parties.

Once the battery had been captured, the guns were to be destroyed. It was essential for the battery to be neutralised half an hour before the first landing craft touched down on the beaches at 6 am. It was thus decided to launch the assault at 4.30 am. If all went well, a naval party attached to the 9th Battalion would contact the light cruiser HMS Arethusa. If no such signal was received by 5.30 am, it would be assumed that the attack had failed, and Arethusa would open fire on the battery with her 6-inch guns. The 9th Battalion would thus have one hour to overrun the position and get clear of it. They were then to set out towards Le Plein.
At 11.10 pm on 5th June 1944, the advance party took off from RAF Harwell. While most of the pathfinders were dropped wide due to heavy cloud cover and poor navigation, the battery reconnaissance and rendezvous parties were dropped on time and in the right place. The reconnaissance party, led by Major Smith, left to scout the battery. Soon after, the RAF bombing raid got underway. Unfortunately, the bombers had unknowingly strayed off course, and apart from missing the battery completely, they came close to taking out Major Smith’s group. In the meantime, the rendezvous party had realised that many of the signal-emitting Eureka beacons intended to help guide the rest of the battalion had been damaged during the drop and were unusable.

Around 30 minutes later, another wave of transports arrived overhead, carrying the bulk of the 3rd and 5th Parachute Brigades. The pilots were confronted by a huge dust cloud caused by the wayward bombing raid. From the air, the River Dives and the River Orne appeared to be very similar, and in the poor visibility, many of the pilots mistook one for the other. These problems were compounded by heavy flak which caused the pilots to take evasive action, throwing the paratroopers around in the back. Weighed down by their equipment, it was difficult for them to stand up and move into position to exit the aircraft in time.
The result was that the paratroopers were badly scattered, with some landing miles from their DZs. Many ended up lost, cut off from the rest of their units, often without their weapons and equipment. Others were seriously injured on landing, or drowned in the surrounding fields which the Germans had deliberately flooded. The worst affected was the 9th Parachute Battalion. Instead of being dropped in a concentrated area, it was spread over 130 square kilometres of Normandy, one stick landing as far away as 50 kilometres from the battery.

Like many of his men, Otway had been flung out of his aircraft as it took evasive action. He landed around 370 metres from where he was supposed to, but having made detailed studies of maps and photographs, he quickly recognised a nearby farmhouse as a German headquarters. Unfortunately, his batman landed on a greenhouse, shattering its glass roof and alerting the Germans. After a brief skirmish, both men got away and started moving towards the RV point, which they reached at 1.30 am. Otway was dismayed to find that there was hardly anybody there. Even the gliders carrying the battalion’s essential equipment had failed to arrive, with four landing too far away, and one having been lost over the English Channel.
By 2.50 am, only 150 men had arrived at the RV - less than 25% of those who had set out. Each company numbered no more than 30 men, armed with their personal weapons and grenades. They had just 20 Bangalore torpedoes and one Vickers machine gun. The loss of the gliders had left them without extra ammunition, heavy weapons, mine detectors, marking tapes, medical equipment, demolition charges, and even a link with HMS Arethusa. Despite all this, Otway knew that the Merville Gun Battery had to be silenced at all costs, or there would be carnage on the beaches. The whole invasion might even fail. Aware of the time constraints, he decided he could wait no longer, and set out for the objective with the men he had with him.
At 4.20 am, they reached the firm base, linking up with Major Smith’s party as planned. They were dismayed to find that the RAF bombing raid had missed the battery completely and had only served to alert its garrison. The reconnaissance party had succeeded in cutting the wire and had marked four routes through the minefield, despite the lack of mine detectors. The men tasked with the job had crawled forward on their hands and knees feeling for trip wires, and left scuff marks with the heels of their boots to mark the safe paths. Subsequently, they had observed the enemy dispositions without being detected, despite an enemy patrol at one point passing within a metre of the ditch in which they were crouching.
Although the assault was to have been led by Major Ian Dyer, of 'C' Company, he was one of the many who had failed to arrive. In his absence, Major Parry was tasked with leading a composite force of around 50 men from both 'A' and 'C' Companies. These were divided into four parties of around 12 men each, one for each casemate. 'B' Company was divided into two breaching teams, who were to use their Bangalore torpedoes to create two large gaps in the wire. The assault force would then enter the battery through these gaps and proceed through the minefield along two of the marked paths before splitting up. Any remaining troops would be held in reserve under the command of Otway, who planned to use them to help mop up any resistance encountered by the assault force.

Otway decided that the assault should be launched as soon as the gliders carrying the coup de main force armed with the flamethrowers landed inside the battery. Two of the gliders were soon seen circling over the battery. The third one had been forced to turn back after a mishap involving its tow rope. Unfortunately, both the mortars and the star shells which were meant to help guide them in, had failed to arrive in Normandy, and although the pilots tried their best to land in the right place, they also had to contend with anti-aircraft fire from the 20 mm guns. One of the gliders landed over three kilometres away, while the other came to a stop outside the battery, right at the edge of the minefield.
As soon as Otway realised what had happened, he gave the order for the assault. It was now 4.30 am and they could wait no longer due to the time constraints. The Bangalore torpedoes were detonated, at which point, the Germans finally spotted the assault force and opened fire from six machine guns. A small diversion party, led by Sergeant Sidney Knight, engaged three of the machine gun posts near the main gate, quickly taking them out, whilst the only Vickers machine gun available to the battalion dealt with those on the other flank.

Whilst this was happening, the assault groups ran through the minefield under a hail of bullets, even as the Germans shot flares into the sky to make it easier to pick out their targets. Inevitably, some men strayed from the marked path and onto mines, while others were cut down by machine gun fire. Yet, on they went, charging towards the gun pits and casemates, firing from the hip and lobbing grenades. Due to the earlier bombing raid, the guns had been moved inside the casemates for safety, but the armoured doors had been left open for ventilation. The paratroopers took advantage of this situation by throwing phosphorous grenades inside, while more were dropped into ventilation pipes. Fierce hand-to-hand combat ensued, yet by 5 am, it was all over. The Germans had been overwhelmed.
Inside the battery, the scene was one of carnage, with dead and wounded from both sides lying everywhere. During the brief but violent battle, 22 Germans had been killed and a similar number were made prisoner. The rest of the garrison had escaped undetected by hiding underground. Of the 150 men of the 9th Parachute Battalion who had carried out the assault, 65 had been killed or wounded, with just over half the force still left standing. To make matters worse, German shells now started falling on the battery. Oberleutnant Steiner had been at a command bunker nearby when the attack started, and had tried to lead a counterattack. When that failed, he decided to direct fire onto his own battery from a couple of nearby positions.
In the meantime, the paratroopers knew they had to finish the job by disabling the guns. It was only now that they realised that rather than 155 mm guns, these were actually vintage Czech M.14/19 100 mm field howitzers, which only had an effective range of just over eight kilometres. Still, they had to be dealt with. With no sappers or explosive charges, they used their Gammon bombs to try to destroy three of the guns, while the fourth was fired after having been loaded with two shells at the same time. Remarkably, despite everything that had gone wrong, this small force had completed the mission in what is still regarded as one of the most outstanding achievements in the history of the Parachute Regiment.
Otway knew that, very soon, HMS Arethusa would start shelling the battery, since there was no way of communicating with the ship. He needed to move his men on as quickly as possible. A German doctor volunteered to stay behind to care for the wounded on both sides who could not be moved, despite Otway’s warning that the battery would soon be shelled. Thanking him, Otway led the rest of his men towards the firm base, where they were to regroup. As it happened, due to some miscommunication, the bombardment from Arethusa never materialised.

Otway’s orders were to proceed to Sallenelles, where he was to destroy a German HQ and naval radar station, before moving on to Le Plein. With his already depleted force further reduced after the costly attack on the Merville Gun Battery, he decided to bypass Sallenelles and proceed to the far more important objective of Le Plein. He had only around 75 men available, and although they succeeded in liberating around half the village, it was only after the arrival of Commandos from the 1st Special Service Brigade later in the day that their objective was completed. Subsequently, the exhausted paratroopers captured the Château Saint-Côme and over the following days, they held off two strong counterattacks by German troops.
In the meantime, on the afternoon of 6th June, the Germans regained possession of the Merville Gun Battery. They succeeded in bringing two of the howitzers back into action, although their rate of fire was significantly reduced. Unable to see Sword Beach from his command bunker, Steiner found it impossible to direct accurate fire, and the landings were unaffected. However, when the British High Command realised what had happened, a second attack on the battery was ordered. This time, it was to be carried out by No. 3 Commando.

The attack was carried out at midday on 7th June, led by Major John Pooley MC. Approaching from Le Plein to the south, No. 4 Troop moved across the open ground before taking up position some 250 metres away from the battery, and from there laid down covering fire for No. 5 Troop, which approached from the east with fixed bayonets. Another fierce battle ensued, with many casualties on both sides, before the Germans repeated their tactic of bringing down fire onto their own position, and the Commandos were forced to fall back. Pooley was among those killed. The Merville Gun Battery would remain in enemy hands until 17th August, when German forces began withdrawing from the area.
On 8th June, Otway was making a routine tour of his positions when a stray shell landed nearby, killing one of his officers and injuring two other men. Otway was knocked over by the blast but looked visibly unhurt. Yet, for several weeks afterwards, he suffered from headaches and pain to the left side of his neck and head, on one occasion even losing his sight for three hours. On 19th July, he was diagnosed with severe concussion and was evacuated from Normandy. Lieutenant Colonel Napier Crookenden took over command of the 9th Parachute Battalion, which held its position until 16th August. The battalion then crossed the River Dives and subsequently reached the River Seine, before being withdrawn back to England in early September.

Otway was awarded the Distinguished Service Order (DSO) for his actions in Normandy. After receiving treatment in a hospital in Cardiff, he was graded unfit for a return to active service. Otway was posted as a Staff Officer to the War Office, but, in May 1945, he was sent to India as Commanding Officer of the 1st Battalion, The King's Regiment (Liverpool), which he was instructed to transform into the 15th (King's) Parachute Battalion. He was later appointed Chief of Staff to the 2nd Indian Airborne Division before returning to England in 1946. In January 1948, Otway resigned his commission, having become disillusioned with the state of the post-war Army.
Several other participants of the assault on the Merville Gun Battery also received gallantry awards. Major George Smith was awarded the Military Cross (MC). Dropping half an hour ahead of the rest of the battalion, he had led the reconnaissance of the battery, at one point walking through a minefield despite having no detector. His accurate report proved crucial in formulating the plan of attack. Major Allen Parry, who had led the rendezvous party, was wounded in the assault but continued to lead his men and helped organise the withdrawal from the battery. He eventually rejoined the battalion and participated in a second airborne drop in Operation Varsity. He also received a MC. Sergeant Sidney Knight, who had led the diversion party, was awarded a Military Medal and was later promoted to Company Sergeant Major.

The citizens of Merville-Franceville-Plage later decided to honour Terence Otway by dedicating a bust depicting him. It was unveiled by Otway himself, on the site of the Merville Gun Battery, on 7th June 1997. In 2001, he was awarded the Légion d'Honneur, and more recently, a new road near the battery was named after him. Following his death in 2006, his wife Jean donated his medals and beret to the Merville Battery Museum. Situated on the site of the battle, the museum helps keep alive the memory of the men of the 9th Parachute Battalion and their exploits in the early hours of 6th June 1944.